 As the online world becomes more transparent, consumers are becoming more susceptible to cyber threats. The good news is, we as business owners can curb this problem by adding a security feature online. In this article, I am going to go in-depth about how to get an SSL certificate for a website (WordPress) and what changes you can expect to see on Google Console and Analytics.
I promise, the process isn’t as complex as you think.
What Is An SSL Certificate and Why You Need One?
SSL also known as, Secure Sockets Layer is a digital file, when installed, will encrypt (convert into code) all the information that is transacted between a web browser (at the user/customer end) and the web server (your website).
When a website implement this security protocol, the domain will change from HTTP to HTTPS and bears a green padlock symbol, like the one on this webpage URL.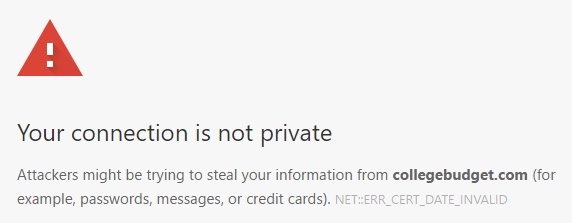
Have you ever seen this kind of message? Chances are, these kind of sites don’t implement any security measures and hence, are more prone for hackers to intercept confidential data belonging to the customers as well as the organization.
From a business point of view, having an SSL can offer a lot of benefits;
- Keep credit card and social security numbers confidential.
- Protect visitors’ personal information.
- Prevent website data alteration and editing.
- Boost website search rankings on Google.
- Gain visitors’ trusts and indirectly improve business sales.
How Much Does It Cost?
The price of SSL certificates varies depending on the type of certs and where you buy it from. Certification authorities such as Digicert and Comodo often cater for larger organizations where this security service would cost about hundreds of dollars per year.
For smaller sites – small business owners and niche bloggers – they can usually be obtained from hosting companies for less than a hundred dollar. For example, over at Namecheap, a personal website certificate is worth $9/year, while a business one cost about $39/year. At GoDaddy, the cheapest plan starts from $55/year.
Meanwhile, there are also hosting companies that offer SSL certificates for free such as SiteRubix, granted your website is built on a custom domain (.com, .net, .org and etc.) and is hosted there.
I happened to use this hosting for my blog and they recently rolled out a new technology which I think is brilliant. In case you don’t know, the conventional method of installing an SSL certificate can be quite complicated (as shown in this video) and I can understand why most people rather pay a professional to get it done.
However, with SiteRubix, the lengthy process is shortened to just a click of a button. Don’t believe me? Here’s how it works.
The Easiest Way to Install SSL
When you use SiteRubix, there’s a unique page that displays the website information and it looks something like this.

Down at the far right column, you’d find a section called SitePlus that offers two types of features. SiteProtect is basically a spam blocker that prevents spammy comments coming in at the server site without the need for an anti-spam plugin.
SiteSSL is the one that we are going to click and it takes only about 15 seconds (or less) to activate the certificate.
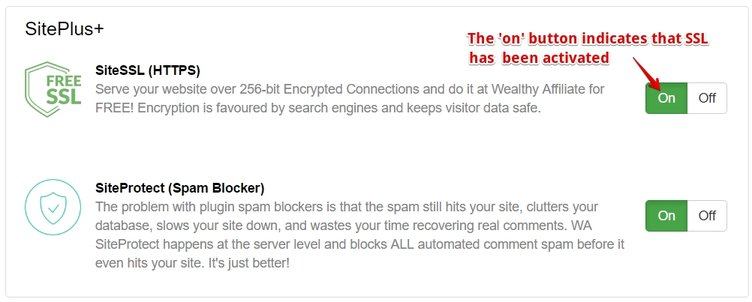
That’s literally how easy it is.
Now, if everything goes well in your WordPress back office (plugin, theme and image compatibility, etc.), you should be able to see a green padlock, the word ‘SECURE’ and your domain converted into HTTPs on the URL within seconds.

If you don’t, there’s no need to panic. You can always send a support ticket to the SiteRubix team and they will respond immediately. Mine didn’t have the padlock symbol after activation and it turned out that the header image was the problem.
The support team fixed it within minutes and everything was good to go after that. Sometimes, it is also worth clearing the cached images and files on your browser for the SSL to function properly.
What To Do After Installing SSL
Changing your site to HTTPs is like building a new website which means Google need to be informed about all the traffic passing through it. Therefore, you need to (re)submit the new site to Google Search Console and Google Analytics.
Let’s refresh the steps, in case you’ve forgotten how it works.
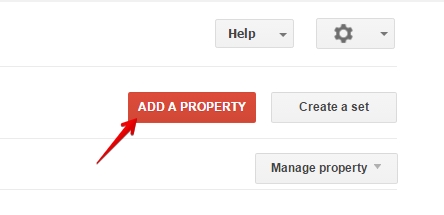
Step 1 – In your dashboard, search for the ‘Add a Property’ button.
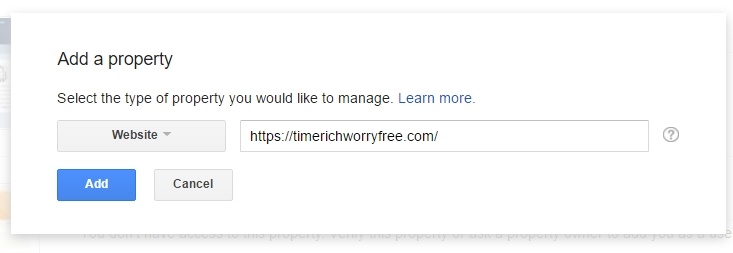
Step 2 – Type in the new website which has the HTTPs.
Step 3 – I personally used the HTML tag for verification as it is easier. Replaced the old Google webmaster verification code in your SEO settings with the new underlined one.

Step 4 – Meanwhile, don’t forget to add your sitemap as well.
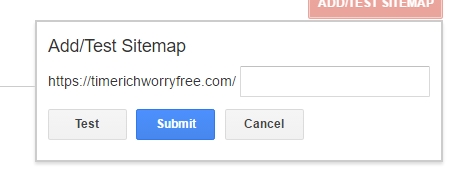
Step 5 – In order to speed things up, you can go to Crawl > Fetch as Google and submit the new URL.
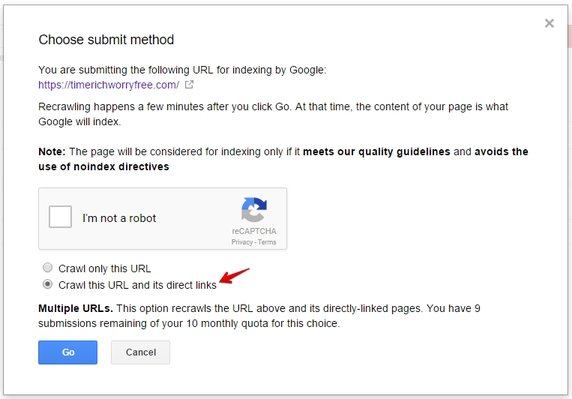
Within a few minutes, Google will detect the site and you’ll see some data showing on the Sitemap. Over the new few days, more data will start to populate on the Crawl Errors and the Search Analytics sections.
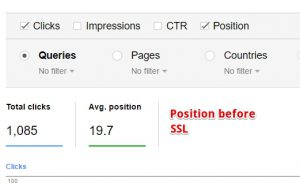
In the meantime, there will be a significant drop in traffic at your original site.

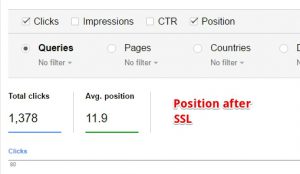
This is absolutely normal so don’t go thinking that you’ve destroyed your website, okay. The ‘loss’ data are merely migrating from HTTP to HTTPs. Just come back to check in a few days time and you are likely to see the benefit of getting an SSL; better search rankings rendering more traffics and clicks.
Meanwhile, over at Google Analytics, there’s no need to do any re-submission. You just need to change your domain to HTTPs and Google will start to track from there. The same process would work for Bing Webmaster Tools too.
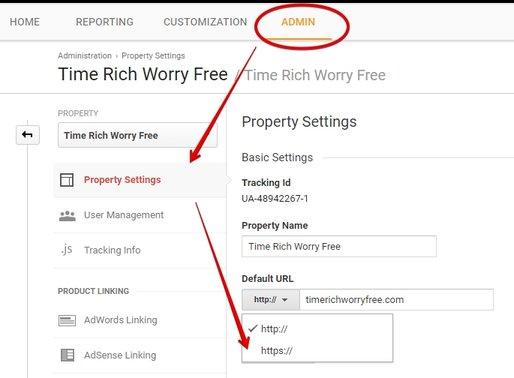
And that’s all there is. Just let the traffic marinates a bit and you should start seeing new sets of data coming through Google.
Use SSL to Create a Safer Internet
Spam and hackers will continue to plague the online space, but with technologies like SSL being made available to everyone, we stand a better chance to protect our customers and OUR business entity. If I were you, I would install it now than later to keep up with the web security trend.
Hopefully this quick tutorial has helped you understand the step-by-step on how to get an SSL certificate for a website. If you want to see the process in more details, please check out the following video training at Wealthy Affiliate.
Have any thoughts or questions about this topic? Feel free to leave your comments below and I’d be happy to respond.
You may also be interested in;

As a member of Wealthy Affiliate myself, I am supposed to install the SSL for my website. Your article reminds me of the importance of doing it as soon as possible. Thanks for the extensive explanation about installing SSL. This article serves as a compliment to what I have learned at WA.
Hi there Cathy,
SSL is most definitely worth getting – especially if it is on offer for free with your host. Benefits I hear are better rankings AND lovely brownie points with your readers in terms of trust factor.
One I am certainly looking at is the SiteRubix you mentioned because I am ever so incapable tech wise. The fact that this can be activated with a flick of a switch looks very tempting.
May I ask, how are support staff at SiteRubix if things go wrong, which for some is perhaps inevitable?
Hi Derek, I did have some theme/designs issue changed when I activating SSL. Wrote in to the SiteRubix team and managed to get it sorted out within two days or so. The key point is to communicate properly and provide some screenshots of the problem so that they know better what you are going through.
Hope this helps.
When I started reading your post, I thought that this SSL certification thing has nothing to do with me. However as I went deeper into the post, I realized that it is very relevant as I am new to online marketing. I will have to re-read your post to make sure I fully understand how to implement the necessary changes to when building my website.
Hi there Everton, these steps are not as complicated as you think. Go through the video training provided – it will help you to understand better what I’ve just demonstrated in this article.
Hello there. I actually learned about SSL only a few days ago. On WA, I watch the training on how to install SSL on my website but was still a little confused. But after reading this article, I was able to finally get that green padlock on my website. Thanks for sharing your knowledge with us.
Well Peter, I am glad it works for you 🙂
Until a couple of months ago, I’d never heard of SSL Certificate for a website. I understand it’s been around for many years, but because it wasn’t available within SiteRubix, I never thought about it. Ever since Wealthy Affiliate introduced this feature, it has become more obvious why it’s important to have one on your site. I’m glad they have given us the option to use it, but most of all I’m glad they are providing it for free.