 There are many of you out there who have great ideas for starting an online business, but when it comes to the fundamentals of building a website, some just get cold feet and are completely lost. This shouldn’t be the case because it’s actually easier to get started now than 10 years ago.
In this tutorial, I will not only teach you how to set up a website with WordPress, but I am also going to take the ‘technical’ fear away from you. If you follow through until the end of this article, you too can have a website that’s ready for the search engine and the audience.
Preparation Checklist
Before we begin, there are a few things that needed to be in place;
(1) Domain availability – You have researched for the right name to represent your business, blog or targeted niche. It doesn’t have to be anything fancy, but understand that when investing in a custom domain, you actually own a virtual property that increases in value as your site matures.
(2) About Me – Assuming that this is your first time blogging, publishing your thoughts online can be quite daunting initially. That was definitely the case for me back in 2014. Heck, even English isn’t my first language!
But if there’s anything that you are naturally good at now, even with no writing experience, you should be able to describe who you are and what’s the purpose of creating the site. Use this unique piece to reinforce your goals and hope. No one is going to judge you so just write freely.
(3) Privacy Policy – This is basically a page that informs your audience that you respect their personal details (especially when you are collecting reader’s email). If you have any form of monetization, the earning disclosure can also be included on this page.
This information reassures the audience that you are running a legitimate business and respecting the law. The template for this page can be obtained from here.
(4) Gmail Account – Last but not least, create a Gmail account if you haven’t already done so. There are a lot of free tools from Google that your website can benefit from and I’ll show how to integrate them in a short while.
5 Steps to Setup a WordPress Site
Step #1 – Connect Domain to Hosting
As a beginner, I would recommend getting your domain, hosting and publishing platform from the same place as there are less technical issues to handle.
SiteRubix is one such place where domains are priced reasonably, the hosting support is excellent and there’s no need to install any WordPress software to your computer.
(1) Buy a domain of your choice over at SiteRubix and remember to activate the Privacy Protection feature.
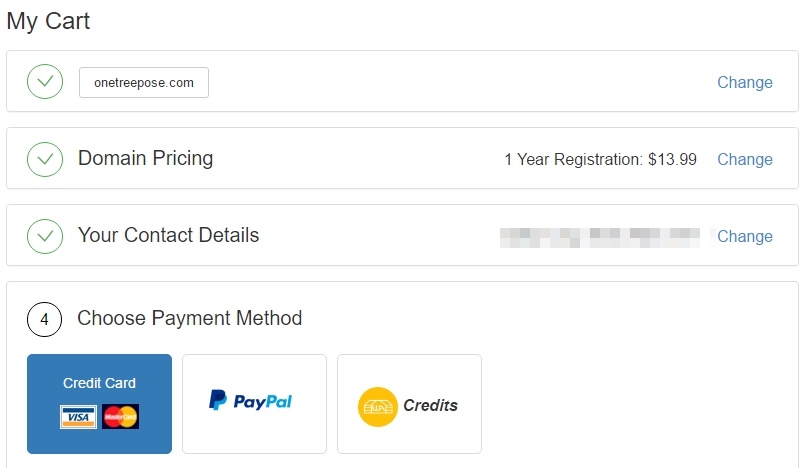
(2) After that, go to SiteBuilder and click ‘On a Domain I Own’.

(3) This is followed by assigning a name for the website, choosing the category of your niche and selecting a WordPress theme to go with the blog. Lastly click on ‘Build My Website’ and you are ready to launch.
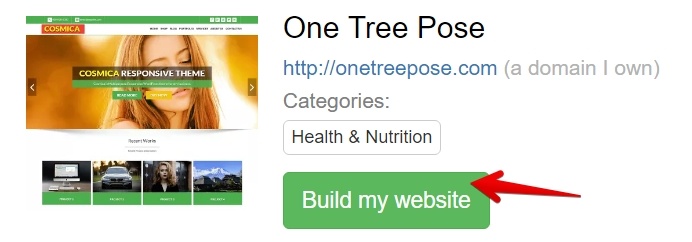
Thereafter, a password will be automatically generated and from now on, you can login conveniently to your WordPress using this panel.

Step #2 – Finding The Right Theme
Here’s what a WordPress dashboard looks like after you logged in.
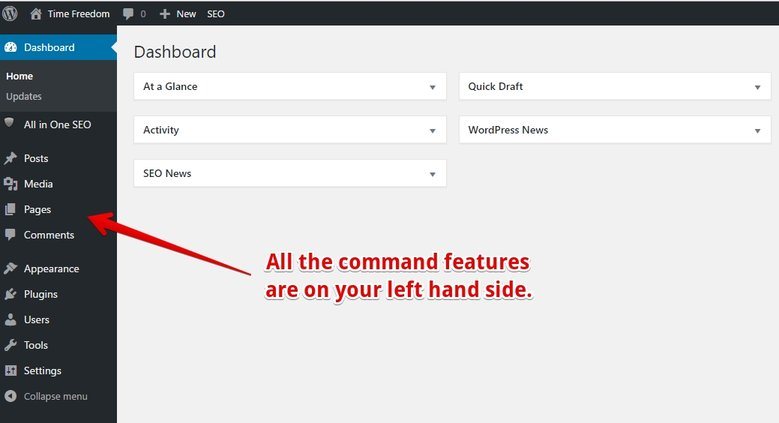
All the main commands will be on your left hand side and the first thing to set up would be to find a suitable theme for your site. Although we did chose one earlier, it’s prudent that you try out different themes as well to find a design that suits your niche.
Since WordPress has more than 4000 free themes, the easiest way to select one is to type in your niche category into the search box.
For example, if you are involved in electronics and gadgets, the best term to describe your niche would be ‘technology’. Here are some of the results.
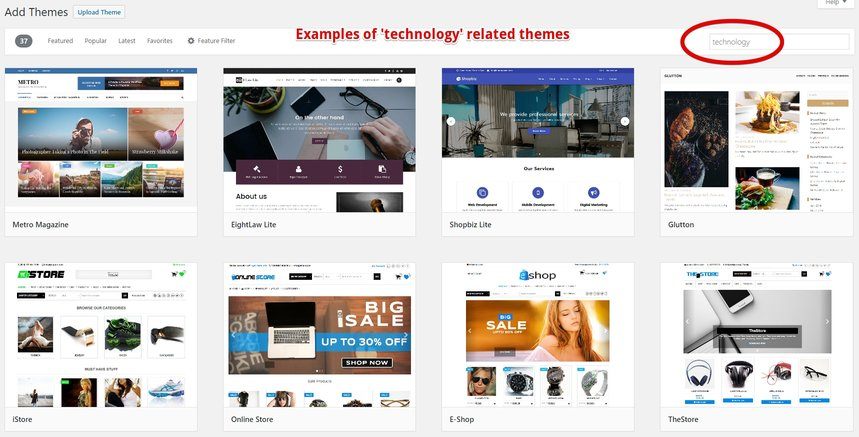
Preview the theme on desktop and mobile mode to have a good feel of what the framework can provide and if you like it, simply click ‘Install’ followed by the ‘Activate’ button.
Step #3 – Install Plugins
With the design in place, we now need to give it some functions and here’s where plugins come into play. Remember, we want search engines to be able to find your site and we want the audience to be able to engage with you.
On the user dashboard, click on ‘Plugins’ and ‘Add New’. Search for these 3 recommended plugins to install.
(1) All In One SEO (AIOSEO)
This plugin will optimize your site, meaning that you can activate and configure certain features to make your site more visible online. Here’s a glimpse of what’s inside the plugin and for beginners, I recommend that you activate the XML Sitemaps and Social Meta.
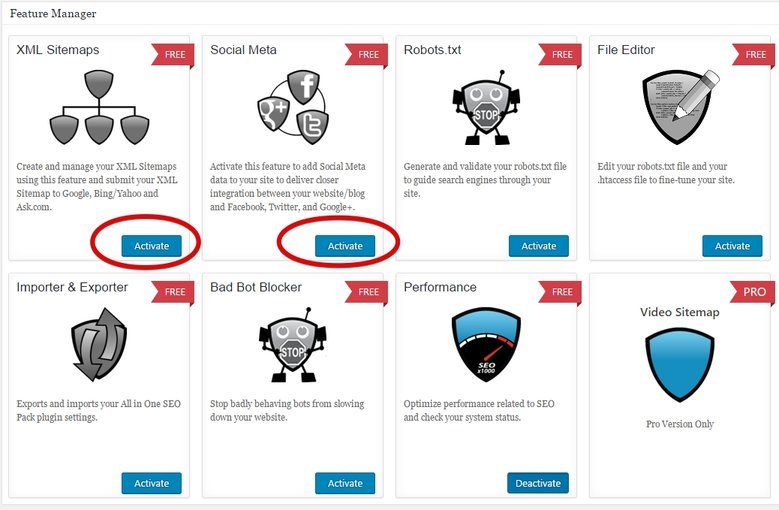
With a Gmail account, you can access Google Search Console and Google Analytics which will provide the codes and ID to be included in the SEO settings. Read this article for more details on how to set up the AIOSEO plugin.
(2) Contact Form 7
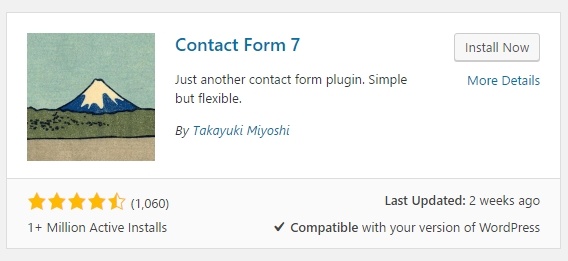
A contact form is a good way for readers to get in touch with you and the sooner this is set up, the better. I recommend using Contact Form 7 because it has good ratings and is constantly updated with the latest version of WordPress.
Before we go any further, I want to show how you can create an email to match your domain name and still get notification in your Gmail account without revealing your personal email address.
At SiteRubix, create an email for your domain.

And then, forward the email to your Gmail account.

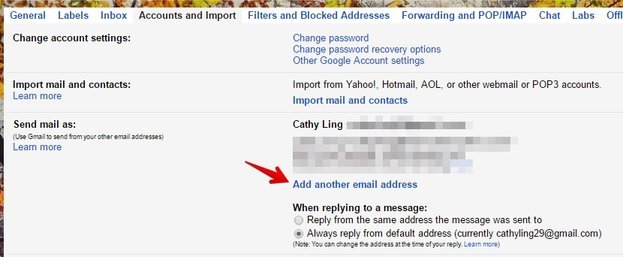
Over at your Gmail account, under ‘Settings’, go to ‘Account and Imports’ to ‘Add Another Email Address’.
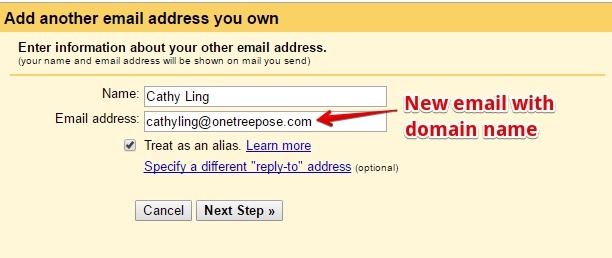
A new window would pop up and here’s where you type in your new domain email.
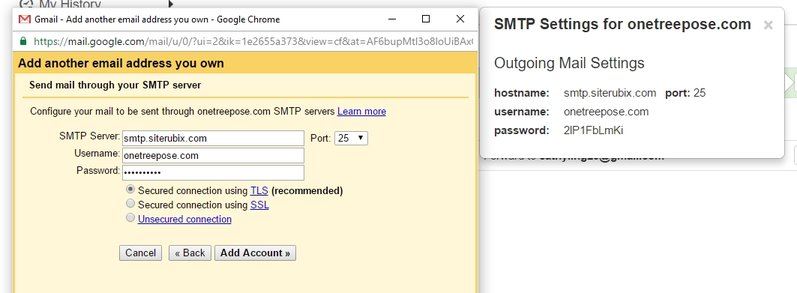
And then, another pop-up window would ask for your SMTP settings, which is available within Siterubix. Make sure to type the information correctly and click on ‘Add Account’.
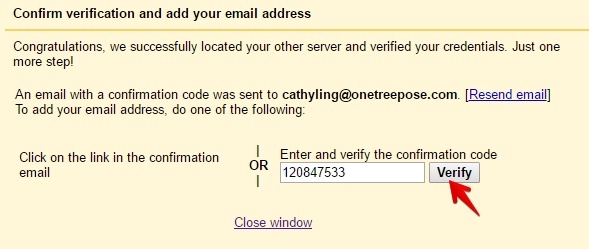
Lastly, check your Gmail account and you should receive a verification code. Enter the code in the pop-up window and click ‘Verify’. You have now successfully added your email domain into your Gmail account.
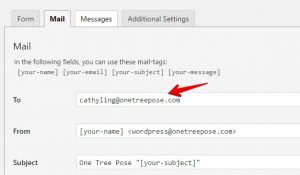
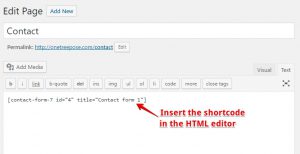
Back at the settings of Contact Form 7, you need to enter the new email domain for mailing. Then grab the shortcode and paste it into the HTML editor of a new page. Your contact form is now ready for published.
(3) Social Sharing
Even though you don’t have any content just yet, it’s okay to install a social sharing plugin first. Experiment with a few until you find one that’s suitable for your site. It’s also worth creating a few social profiles if you want to acquire traffic from social media.
When running a small business, the profile name should match your domain name as it delivers consistency in branding. If you are just starting out as a niche blogger, it’s okay to use your own name. You don’t need to go after every social network out there. Just pick 2 or 3 and go with them.
I personally use AddThis to create my social share and followers. To learn how it works, read my review about the plugin here.
Step #4 Create Your Pages
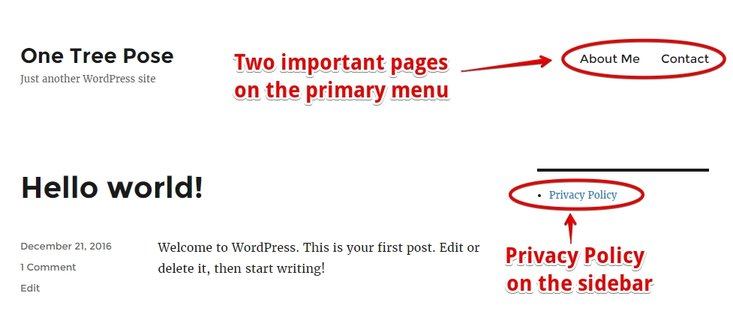
The 3 main pages that you should have is an About Me, a Contact Form and the Privacy Policy – all of which I’ve shown you how to create earlier. I always recommend to place the first two on the primary menu and the last one somewhere on the sidebar or the footer area.
You can create all these menus by accessing Appearance > Menus or Appearance > Widgets at your user dashboard. Here’s what the end result would look like.
Step #5 Create Your Blog Posts
Blog posts are basically the part where you’ll be producing content regularly for your website. Here’s where you apply the knowledge about your niche and keyword research into an informative piece that can help you get ranked on the first page of Google.
 There are two things to do every time you publish a blog post; share on your social networks and get reader’s comment. With a social plugin in place, the first task shouldn’t be a problem.
However, as a new blogger, you might struggle with getting comments because people don’t really know about your site just yet.
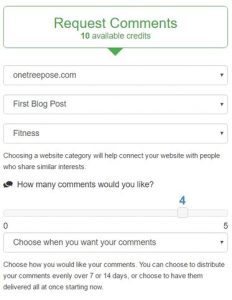
Fortunately, there’s a way to help you out. When your site is hosted within SiteRubix, you’ll also get access to the commenting system that is supported by other members who are using the service. For every 2 comments that you offer to other people’s website, you’ll get to request for 1 comment on yours.
You can pick whichever page/post, number of comments and comment frequency that you want on the settings.
All Set For Success
Most of the technical aspects that I’ve described here; you just need to set them once and there’s no need to come back to them unless you want to update or change something.
Neither should you be wasting too much time analyzing about them either. What’s important is your content (point #5) because that’s the one that will be attracting traffic to your site.
I hope you’ve found something useful on how to set up a website with WordPress in this tutorial. My intention is to simplify the process, not make it confusing for you. You can also learn more by joining my recommended online training here.
If you have any thoughts or questions in regards to the topic, please do not hesitate to leave your comment below.
You may also be interested to read;
SiteRubix Hosting – More Than Just a WordPress Website

Hi Cathy,
This is such a great step by step guide for beginners who want to create a WordPress website/blog. I started with zero knowledge and had no idea how much I didn’t know. I would have loved reading this when I was new to WordPress. It is comforting to see it detailed out and simplified the way you have outlined it. Thanks for this great resource.
Hi Cathy
Thank you for the very detailed description on how to set up a WordPress website. It does seem to be very easy and what I like the best is that no coding or programming skills are needed 🙂 Everything is done for me so I can just think on the visual design and content creation.
I also learned a new thing – didn’t know that you can add e-mail domain into g-mail. I have to do this! Thanks a lot.
Yup, getting an email forward set-up is crucial. If you are someone who uses Gmail regularly, you’ll be able to receive readers email notification easily.
Hey Cathy,
This is wonderful information. You literally walked me through each and every step. Anyone who follows these steps is sure to be on the way to creating a very successful website. When I first setup a website, I was kind of scared because I did not know how to do it. I wanted someone to walk me through personally just like you did. Great stuff!
Hey Kendrick, glad to know the information was helpful for you 🙂
Wow this is brilliant Cathy! I have never seen such a comprehensive breakdown of what is needed to make a successful website with Siterubix and WordPress. I also strongly agree that even though every step in this article is crucial, the most important part is definitely the content first.
When did you first learn to understand all these points?
Thanks visiting my blog, Marley. It’s actually through a series of mistakes and reading other people’s questions in the Wealthy Affiliate community that I started to connect all this information together. I realized that there’s a system in place on how things work. You just need to spend some time understanding the concept and the rest will start to make sense.
This is such a comprehensive tutorial It is very easy to follow and everything is spot on. This is really helpful because people always have the impression that setting up their own website requires advanced technical skills, which is absolutely not true.
I like SiteRubix because they also offer free domain, but of course having a (paid) domain of your own is much better when you want to run a profitable business website.